How to create your own resin cofiguration for the Lychee Slicer
I have to admit that filament printing with Prusa MK3s is way better than printing using resin. Unfortunately, It is hard to print quality miniatures on a filament printer. I bought a cheap Anycubic Photon Mono 4K printer with Anycubic Eco Resin Gray to achieve that.
Today I also want to share my thoughts on converting the STL file to a printer file on resin. Let’s say we already have an STL file that we want to print. We will focus only on printing here.
Which slicers have I tried?
Anycubic Mono 4K requires a pwma file to print.
Prusa SLicer
Prusa Slicer does not offer export to formats other than those needed for Prusa resin printers. You can export the model with support, but I had trouble getting them to work well.
Anycubic Photon Workshop
Anycubic Photon Workshop is a vendor app for creating pwma, but it has very limited functionality and an unfriendly interface
Chitubox
Chitubox was one of the recommended software, but I read many about its bugs. Again, UX was unintuitive for me.
Lychee slicer
And the last one: Lychee slicer is so popular and robust even many miniature model sellers include lychee projects in their packages. Many options require a paid plan, but it is possible to get a successful print with the free tier. I use the Lychee slicer.
Time to configure the Lychee slicer
User print settings
There are many available presets for Photon Mono X, but - I was initially not satisfied with them. My bad print results could be affected by not shaking resin before use and newcomer mistakes (for example: insufficient supports, scaling miniatures with supports etc.).
Official values
There are official values for printer/resin configuration that are available HERE. They are also available in Lychee slicer. I believe they are way too fast for new resin user, slower speeds ensure there are issues elsewhere.
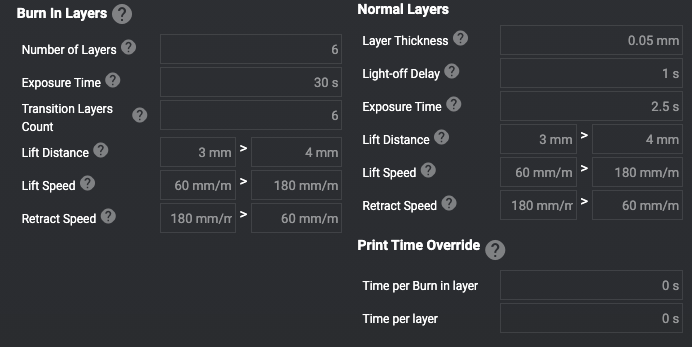
Generic values in Lychee
I checked values that are generic for this printer. I believe they have a reasonable speed for the initial resin test. 60 mm/m translates to 1 mm/s.
RERF test
Once I had determined printer speeds, I had to find proper exposure values. Fortunately, Anycubic has a dedicated R_E_R_F file (it is treated differently by the printer), so you can determine the best exposure value (for me, it was something between 2.25 and 2.5)
Creating my settings
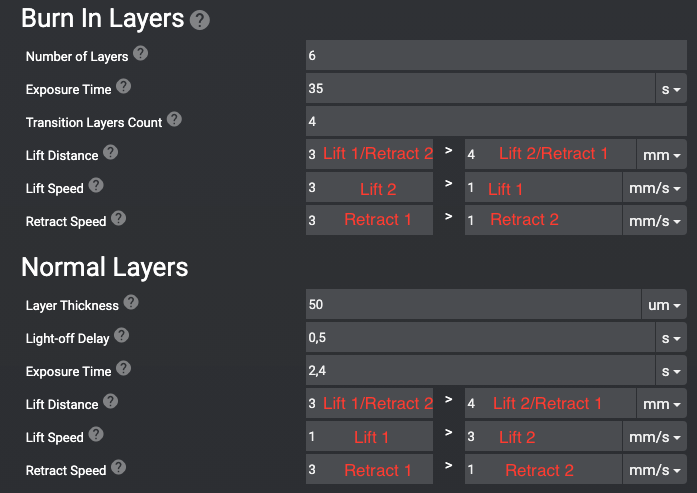
I decided to use the manufacturer’s configuration, but with slower printer movement and use an exposure time of 2.4s. After the first try, I noticed that printer speeds were not what I wanted. It is because printer speed times are not labelled correctly. I found this Reddit post, but I was unsure about the values (they mentioned something about configuration changes in 4.1.0). Fortunately, after tests - it looks like they are still valid now.
I am talking about the latest version 4.1.0 (as of 10/03/23). I hope there will be more descriptions of configuration fields in the future.
My final settings. Note that they may be slightly different for others, even for the same resin. Remember to check the units!
Conclusion
Configuring the Prusa MK3s is much easier than the Photon Mono 4K printer. After almost a year of using the Anycubic printer, I am beginning to have a certain amount of confidence in it.